When you print photographs for business projects or flyers, you want quality pictures and sharp, lively colors. Print on Glossy Paper is thick and sufficient to support the quantity of ink used while printing photographs. This kind of paper often has one glossy side plus one matte side.
To print your photographs on the glossy side, you need to load the paper into your printer properly. Correct loading also confirms that the paper does not get stuck otherwise jammed as it goes over the printer.
What is Glossy Paper?
Glossy Paper refers to any coated papers intended to present an ultra-smooth toward shiny look. Applications contain advertising, flyers, brochures, one sheets. Photographic printing as well as other presentation documents are also created.
Glossy Paper has a shimmering look, that reflects light, plus you get lively rich colors. It makes the color in your pictures pop on the sheet. It is attractive to the eye; however, it has higher contrast.
Glossy photo paper is shimmering—this makes the color in your image “pop” on the sheet. The glossy finished improves the color in the photograph, making a more vibrant image. The extra shine works fine on print files with heavy color coverage, particularly photos and big graphics. This effect also creates the color on the photograph prints look like they have higher contrast.
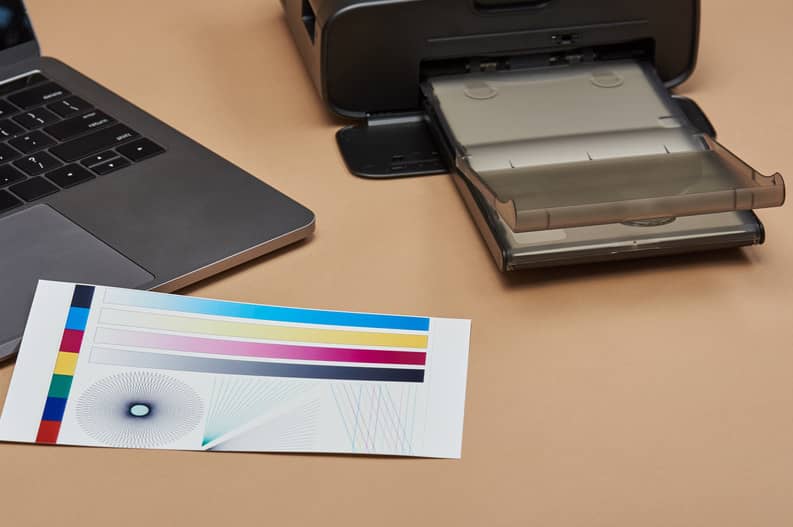
What Kind of Printer and Printer Ink Do You Need to Print on Glossy Paper?
Specialize inks do tend to perform better plus dry much faster than non-specialized inks. As we touched on above, traditionally, a dye based ink was better for use on glossy paper. But modern pigment based ink formulas could perform well too. Even some of the dye based ink formulas perform better than others with some drying in minutes and some taking up to an hour.
You could help your ink by using an optimized glossy paper too. And more and more high-quality glossy paper kinds have been released over the years to make it much easier for the user. For instance, if you are in search of glossy paper for your printer then there is optimized inkjet glossy paper. As well as optimized laser printer glossy paper. It helps each printer type perform better with the paper plus get the ink to dry as fast as possible.
When it comes to writing with a marker otherwise fountain pen on glossy paper, we would actually recommend that you avoid the high GSM glossy paper. As the gloss effect essentially detracts from the normal advantages of a higher GSM rating. Regular glossy paper tends to be a good mid ground for anybody who is wanting to write or draw on glossy paper with a fountain pen or marker. So that would be our recommendation to our readers.
Before you purchase a printer for glossy paper there are some features that you require to pay attention to. If you are not careful, you may purchase something that does not have the features you need or want. Also below is what you should consider for a sticker paper printer.
High Resolution
While purchasing the best sticker printer, make certain that you choose one with high resolution. Recall, it should print the image or other objects in high resolution. For example, the lines which are unseen while printing become visible while printing in low resolution.
Wireless Connectivity
While there are numerous costly high-capacity models in the market, look for a compatible model with your computer. It must also have built-in wireless connectivity. This way, you can shift from one device to another and print out several stickers or labels.
Trustworthy Client Support
A printer’s worth is nothing when you are unable to reach support in case you face an issue. Your time plus peace of mind matter the most, thus your printer model must have brilliant client support. Timely aid provided by professionals creates any printing work convenient and hassle-free.
Cartridge
This must be a major concern since it amps up the operating cost. As you are looking for a color printer to produce your stickers. Though, you must make certain the ink cartridges last longer. So that you do not have to run to the store in the mid of the night!
You can select from various companies, depending on which one you feel is correct for your requirements. Also, keep in mind to always use multipack ink cartridges as these would work out inexpensive in the long run.
How to Print on Glossy Paper
Customers now have several choices of paper to use with their PC’s printer. Those who are printing photos could select photo-quality paper to use in their printer. Photo-quality paper is accessible in heavier weights. And it comes in a matte otherwise glossy finish, just as in customary photography paper.
Step 1
Buy the glossy paper suitable for your PC’s printer. What works in an ink-jet printer might not work in a laser printer. Glossy paper might have a varnish coat, and if the specific brand could not tolerate the heat of a laser printer, you might damage your printer. Read the packing cautiously.
Step 2
Create a load of up to 25 sheets of glossy paper, dependent on thickness. Fan the paper, then tap the stack on a flat surface a few times to even out the pages.
Step 3
Clean the rollers on your printer beforehand using glossy paper. Or the rollers might have a hard time feeding the gloss paper over the printer. Refer to your printer’s manual on for guidelines on how to correctly clean the rollers.
Step 4
Feed the paper over the printer one page at a time. Glossy paper has additional width and creates static electricity. Two pages of glossy paper could easily stick together, particularly during low humidity. Do not load the glossy paper in your printer’s paper tray; feed one page at a time.
Step 5
Turn the paper thus the glossy side faces up. Feed the load of paper into the paper support. Do not force the paper into the printer. If the pile of paper is too dense to fit, eliminate a few sheets and try to load it again.
Step 6
Move the paper guides toward the edges of the paper. For some printers, while you move one paper guide, the other moves consequently.
Step 7
Permit the printed paper to dry in the printer’s paper tray before eliminating. Carefully eliminate the paper (holding by the edges) from the tray beforehand printing another page.
Step 8
Lay the printed paper on a flat surface to entirely dry. Ink would easily smear on glossy paper. so be sure it is totally dry before touching otherwise inserting into a page protector.
Always refer to the following guidelines beforehand using glossy paper:
Getting the finest prints from your printer
Use the correct paper:
Normal printer paper has a matte surface that absorbs ink and permits the droplets to soak in plus spread out. This is a related problem to that faced by newspaper printers. This programs a ‘dot gain’ into their presses to take it into account. This is not something you could easily do with a home inkjet printer. Thus by using glossy photo paper, which has a glossy surface and does not let the ink spread out, keeping the dots tiny. And so allowing a more specific image to be printed.
Use the correct ink:
Even if your printer only supports four colors – typically cyan, magenta, yellow and black. You could swap the cartridges for special ones that comprise lighter variants of the colors plus a deeper black. If your printer supports six ink tanks, then ponder spending the additional money to fill the vacant slots, as you will get a better outcome. Similarly, stick with your manufacturer’s ink. Third-party otherwise refilled cartridges are fine for text and bar charts. But for photographs the entire system needs to work flawlessly together.
Keep the resolution up:
To print at A4 and with 300DPI you will need an image with about 8.5 million pixels in it. Most digital cameras released in the past ten years could manage this. But if you have cropped heavily into the image then you could run into trouble.
If you used a cellphone’s front-facing camera, which are frequently lower-res than the back cameras then problem also arises. As the resolution decreases, thus the image quality reduces. Conversely, if you are shooting with a camera that takes images with huge megapixel figures. It can make sense to downscale the image to match the output resolution of your printer. It would do this anyway, but taking manual control could produce a better result than leaving it to the printer’s brain.
Test first:
Do not expect to get it right first time. You will need to tell your printer that it is printing a photo, that it’s printing on photo paper. And that you expect it to print at its maximum resolution and in color. You will also need to double-check the ink tank. And load your special paper in the correct tray and make certain it is the right way up. This isn’t an immediately intuitive procedure. Thus there will be some casualties along the way.
Photo paper is only glossy covered on one side. And printing on the more absorbent back produces a nasty mess rather than a sharp photograph. Test prints also provide you the chance to make last-minute adjustments to your image. They often look much brighter on the screen than they do on paper. So take the time to lighten it up plus get it right the next time.
Final Words
When everything works, however, you will receive a print that is easily as good as those produced by a digital photo lab. What you will not get is the ease of printing several images in a batch. As feeding the paper in and checking the settings each time quickly becomes tiresome. For the occasional print to show off your photography skills, home printing from an inkjet printer could be a great way to get a hard copy of a digital image.
frequently asked questions
Can you put glossy paper in a printer?
In short, yes, laser printers could print on glossy coated paper. As long as the correct kind of paper is used, great printing effects on glossy paper could be achieved with any laser printer.
Can Deskjet print on glossy paper?
If the glossy paper is coated and intended for inkjet printer use, you can certainly use it. Glossy inkjet paper offers amazing photographic prints. If the glossy paper is not coated for inkjet printing, it might not work very well. The ink might just sit on top of the paper and not absorb into the paper properly.
What side of the printer do you put glossy paper on?
Place your photo paper in the tray with the glossy otherwise printable side facing down. Hold the paper by the edges to evade fingerprints on the glossy surface.
Do I need special ink to print photos?
Special inks are not usually required for printing on these media. Glossy papers could suffer from ‘bronzing’ while prints are made with pigment inks. This specifies the ink is unevenly deposited and/or absorbed by the paper.
Does glossy photo paper use more ink?
In general, glossy paper will need more ink than plain inkjet paper. Do a rapid test, take a sheet of plain inkjet paper, set up for inkjet paper, then print a small image.
Is glossy paper more expensive?
As paper goes, glossy paper is often less costly than matte. And is seen by some as the more professional option.